Advanced Custom Fields (free), and ACF Frontend Pro
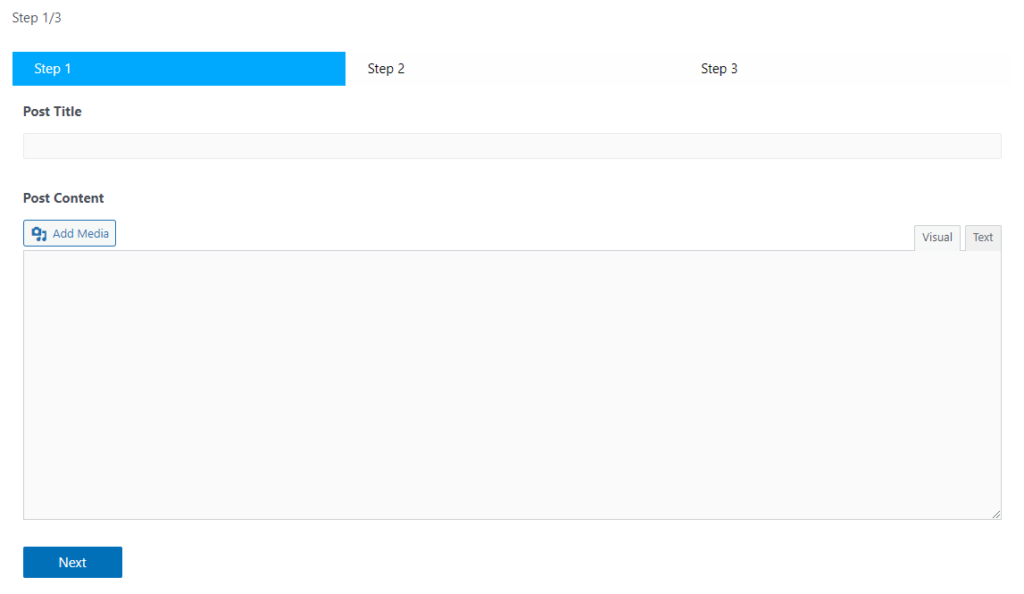
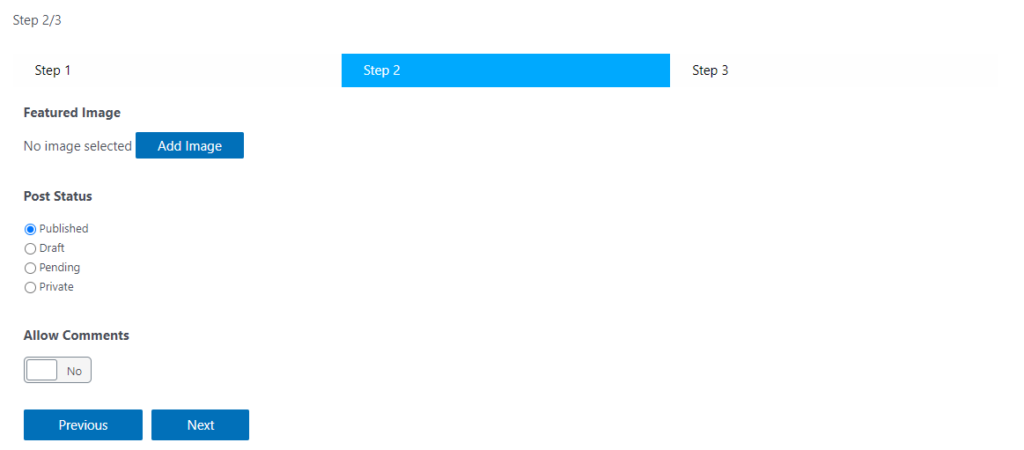
Multi Step Forms allow you to create forms which are split into multiple steps or “pages”. This is especially useful for longer forms or forms with multiple parts. The user can navigate through the pages when filling out the form.
Creating the Form
First you create a form like any other. Click the ACF Frontend > Forms > Add New. Multi step forms are supported by all the form types.
You can start adding fields right away and convert it to a multi-step form later, as well as convert existing forms to multi-step.
Turn on Multi Step Forms
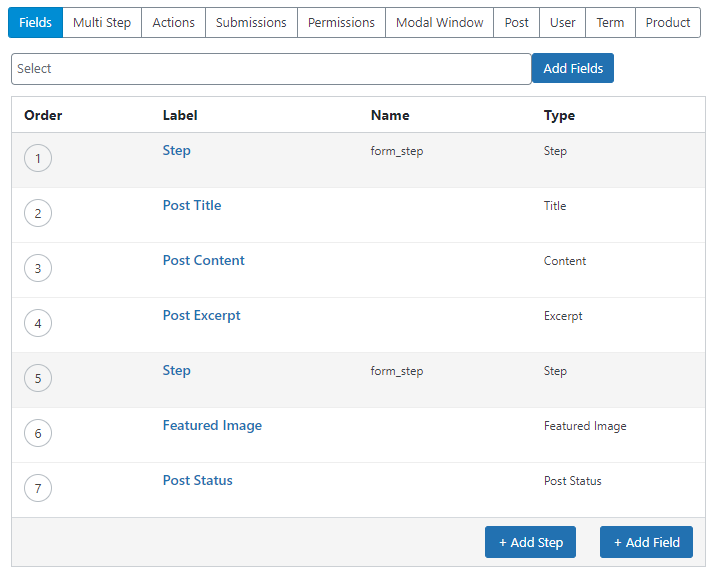
At the top of the form builder there is a tab called Multi Step. Inside is a selector to enable Multi Step. Turn this on and the multi-step feature will be activated. This will add a few new fields to the form which have the field type of “Step”.
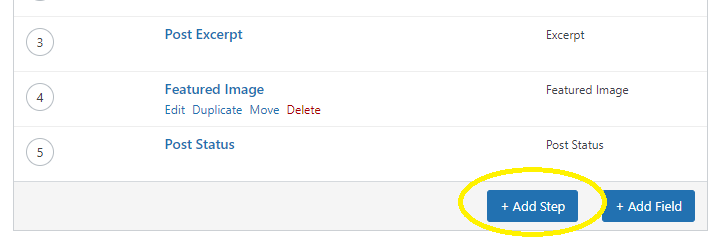
You can also make a form Multi Step by clicking the “Add Step” button at the bottom of the form, located next to the “Add Field” button.
Configure the Steps
The fields are grouped into the different steps by the new “Step” field which is added to the form. The first field is set in place as you need to have at least one step. The next step field is at the end of the form. Move it to the point in the form where you want the second step to start. All fields between the step fields will be shown in the first step, and all fields after will be shown in the second step.
To add a third step, duplicate the step field and move it to where you want the border of the next step to be.
There is no need to add a step for the end of the form.
Steps Options
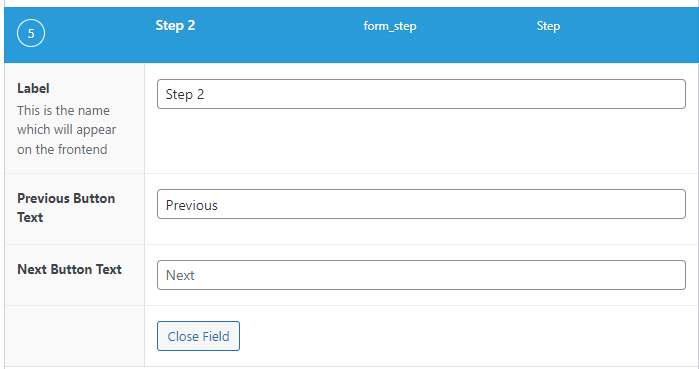
Each Step Field has several options. In addition to the actual fields within the form, multi-step forms contain several other elements. This includes the name of the step in the navigation tabs, forward and backward buttons for navigating the form, and the submit button.
Note that in multi-step forms there is no distinct submit button, the submit button is actually the “Next Button” in the last Step field.
- Label: This defines the name of the step in the navigation tabs.
- Previous Button Text: Here you can set the text for the button which navigates to the previous step. To hide the previous button altogether, set the text to be blank.
- Next Button Text: Here you can change the text of the button which navigates to the next step. In the last step of the form this button acts as the submit button for the whole form.
Steps Settings
In addition to the individual step options, there are several controls to configure the entire form.
Steps Display
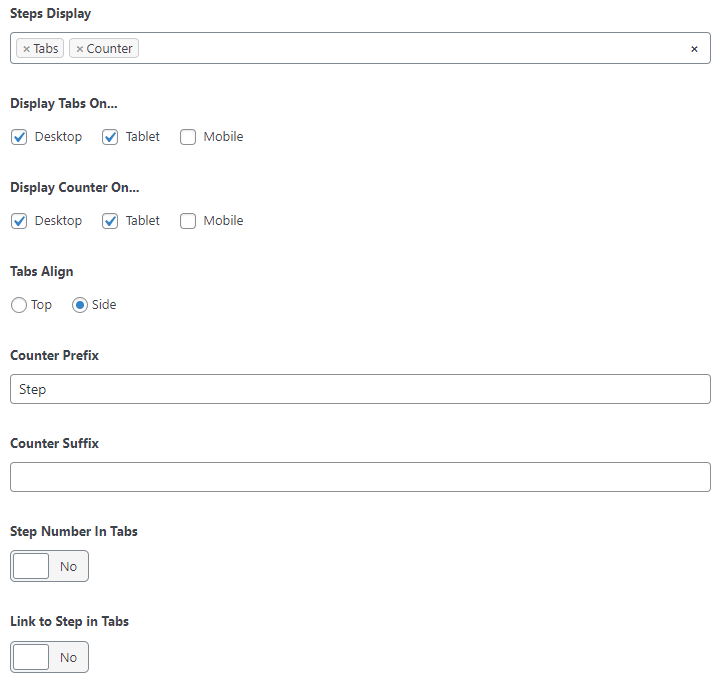
This defines what types of navigation info and buttons will be visible. By default this includes the tabs. You can disable this if you wish. There is also an option to add a counter which is shown at the top of the form. This will show the user how far along the form they are.
Display Tabs/Counter On…
Here you can configure responsive formatting for the tabs and counter (if enabled). Choose which devices you would like to show the tabs or counter, and the other devices the tabs will be hidden. If the tabs are hidden the user will be able to navigate via the step button at the bottom of the page.
Tabs Align
Here you can configure the tabs to be shown beside the form instead of above it.
Step Counter Prefix and Suffix
This defines the text shown before and after the actual numerical step counter. By default, the prefix is “Step” and the suffix is blank, but you can set them to be anything you like, including dynamic tags.
Step Number in Tabs
This adds a prefix to the step titles which show the step number. You can also set each step’s title manually if that fits your needs better.
Link to Step in Tabs
By default the step tabs are simply for display. If you enable this option the tabs will all be changed into links the user can use to navigate the form. This allows them to jump around instead of needing to navigate a single step at a time.
Conclusion
Make sure you save the form with your edits, then paste the shortcode into your site and your form is ready for use!

