Required plugins: Elementor (free), Advanced Custom Fields (free), and ACF Frontend (free)
The New Post Form widget enables users to add new posts to a custom or WordPress standard post type from the frontend of a WordPress website, without needing to interact with the WordPress dashboard. The page to host the form is built in Elementor.
Important: By default a user needs to be logged in and carry the “administrator” role to add a post. This can be changed, however, in the Permissions settings of this widget.
Adding the Widget
Create a new page to host the form, then click “Edit with Elementor” to open the Elementor page builder.
Search for “Add Post Form” in the sidebar, and drag the widget into the page. To learn more about using the Elementor page builder see Elementor’s official tutorial.
There are many different options in the menus. We will go through the most basic ones here. There will be further guides going more in depth through each section.
Form Fields
Be advised: In previous versions, this section was called “Form Structure”.
This section defines the fields which are shown within the form itself. This is where you actually define what data the end user can access.
Default Fields
By default, the form will have the Title, Content, Categories, and Featured Image fields activated. These can be customized to whatever fits your needs.
Adding and Removing Fields
To add more fields simply click the Add Item button. The form on your page will change to reflect these new fields. Fields can also be deleted by clicking the X.
ACF Fields
You can add ACF fields by clicking Add Item and changing the field type to ACF Fields or ACF Fields Groups and then selecting the desired fields or groups.
Form Title
The Form Title is the title for the entire form. By default it will be called “Add Post”, but it can be left blank if you wish.
Submit Button
At the very bottom we can edit the text displayed on the Submit button.

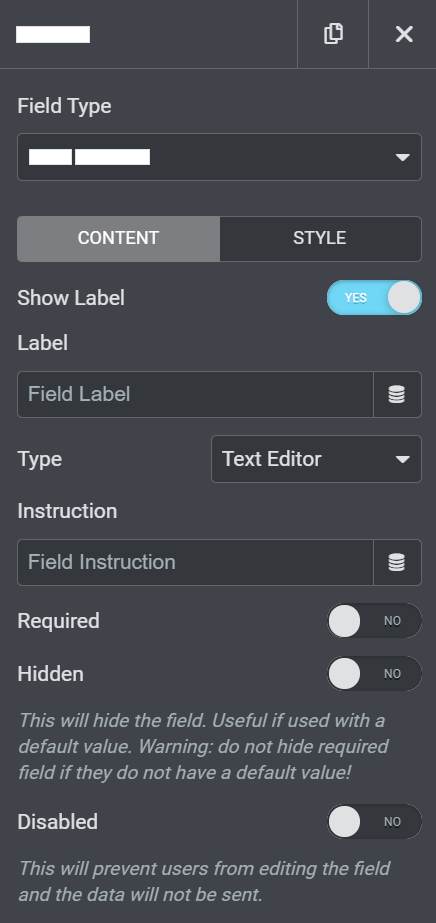
Basic Field Attributes
The Field Type defines the type of field being edited. Changing this will affect the other available options.
All the field types have options which can be changed to customize both the content and the style of the field.
- Label – This is shown above the field’s text box. This can be toggled to be displayed or hidden according to your needs.
- Instruction – This is shown in smaller text under the Label.
- Required – Indicates if the field can be left blank.
- Hidden – This will hide the field. It is useful if the field is being used with a default value.
Warning: do not hide a required field if it does not have a default value! - Disabled – This will prevent users from editing the field and will not send the data.
Field Specific Options
As mentioned above, there are many options which are unique to a specific field type. We will cover some of the options for the default fields. There will be more articles going in depth to each field’s options.
Post Title
The Title Field is a simple text box. We have the standard Label, Instruction etc. Additionally, there is an option for adding Placeholder text, indicating what type of content is expected from the user.
Content
The Content Field is also a text box. You can customize the text box type, it can be a Text Area or a Text Editor.
Featured Image
This allows your users to add a featured image to the post. In addition to the basic attributes, you can add a default image if you wish.
Categories
This allows the users to select the category for the post, using the standard “Category” field of WordPress posts.
We can restrict the user to a single choice or allow multiple selections.
The single choice options are radio buttons or select, and the multi-choice options include checkboxes or multi-select.
Additionally, we have the option to allow the user to add more categories right from the form, with the Add Term setting.
Actions
Here we have several options for additional actions to take place outside the form itself.
You can define where the page should redirect to after submitting. By default it will reload the current Page/Post. We can choose to redirect to the live post by selecting Custom URL.
You can also define a custom success message, or choose no success message, whatever suits your needs.

Post
Here we define the Post Status for the new post created by the form. The post can be published immediately, or set to Pending Review if you would like to approve them. You can also choose Draft or Private if those would fit better.
Additionally, you can specify the type of post created by the form. It can be a Post, a Page, or any custom post type you might have created.
To learn more about custom post types, take a look at this video: How To Display Custom Post Types In Elementor.

Permissions
This is where we limit which kinds of users can access the form. It is very important to configure this correctly, as otherwise your users might not be able to see the form at all!
By default, only administrators can see the form. If you want to allow other users to access it, you need to add them. You can choose Roles under the Select By Role option, or add specific users under the Select By User option.

Modal Window
This will hide the entire form in a button which then will pop open in a modal window when clicked. This can be useful if you wish to build a custom frontend dashboard for each user, and want them to be able to see their old posts and add new ones from the same place.
Final Result
Here we can see what the completed form will look like from the front end:
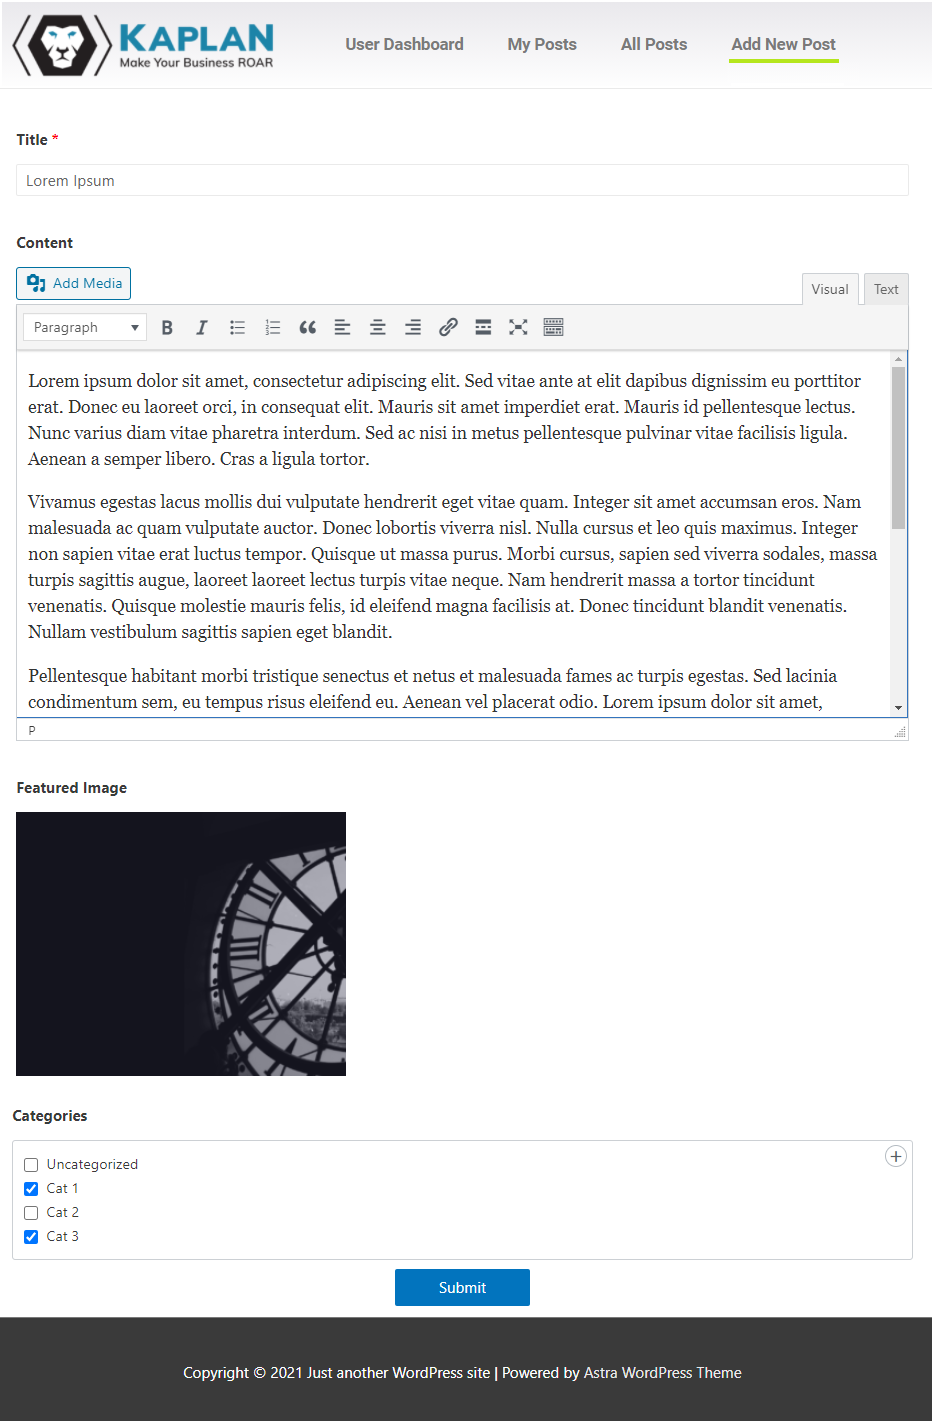
The end user can easily create posts with custom post types, add a featured image, and select the Category, all without touching the backend WordPress dashboard.
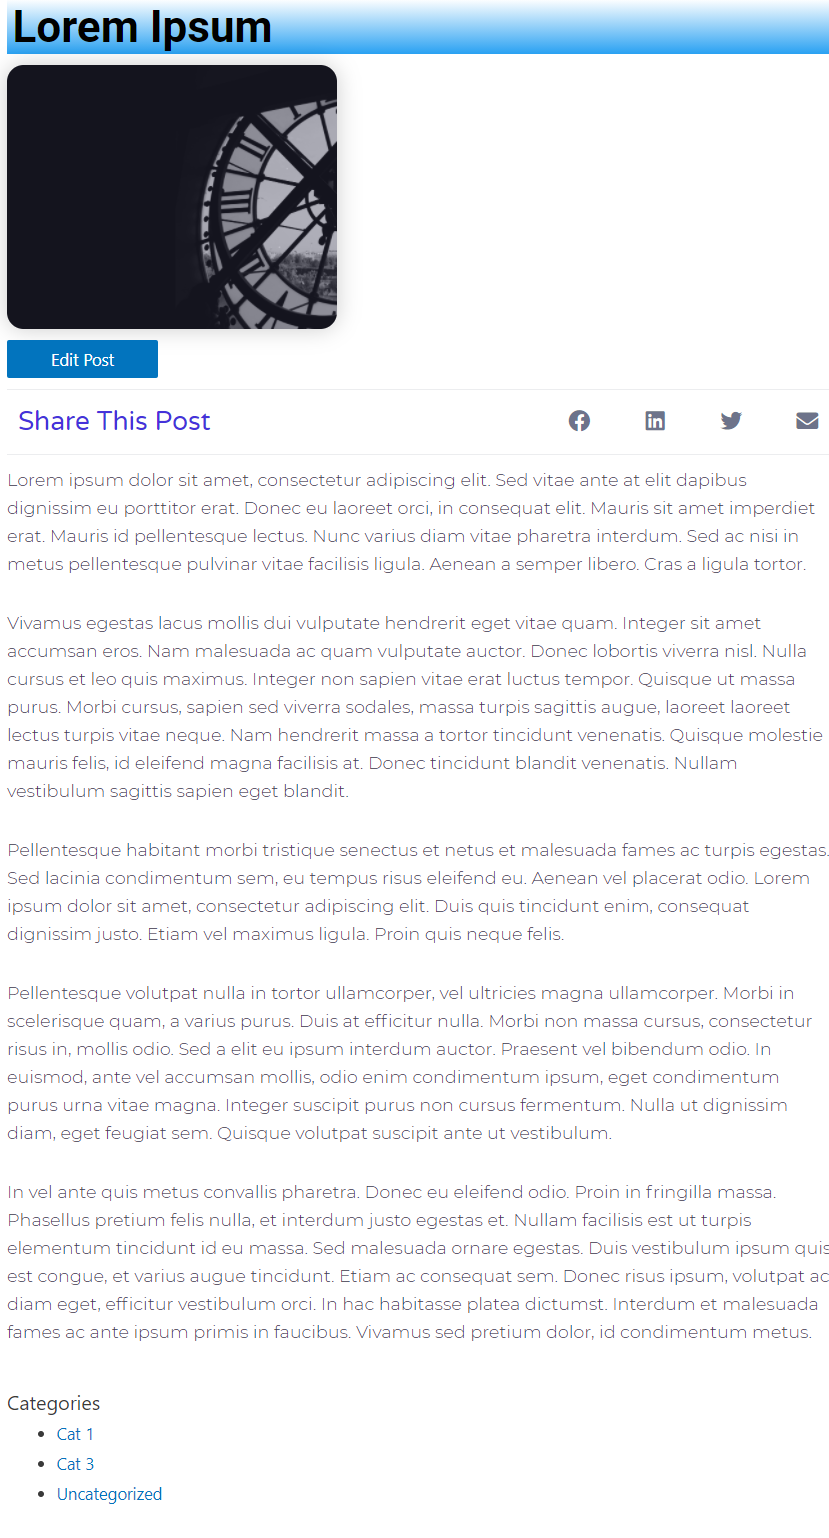
Here you can see what the submitted post looks like live, complete with an “Edit Post” button (visible to specific users only) which can be added with the Edit Post Widget.