A variable product is a WooCommerce product type that lets you offer a set of variations on a specific product, with control over prices, stock, image, and more for each individual variation. They can be used for a product like a shirt, where you can offer large, medium, and small and in different colors. You can read more in the official WooCommerce Docs article.
In the Add Product article, we covered the basics of building a form for adding simple products. If you haven’t read that yet you should stop and read it through before continuing. In this guide, you will learn how to make a form that can create variable products.
Form Fields
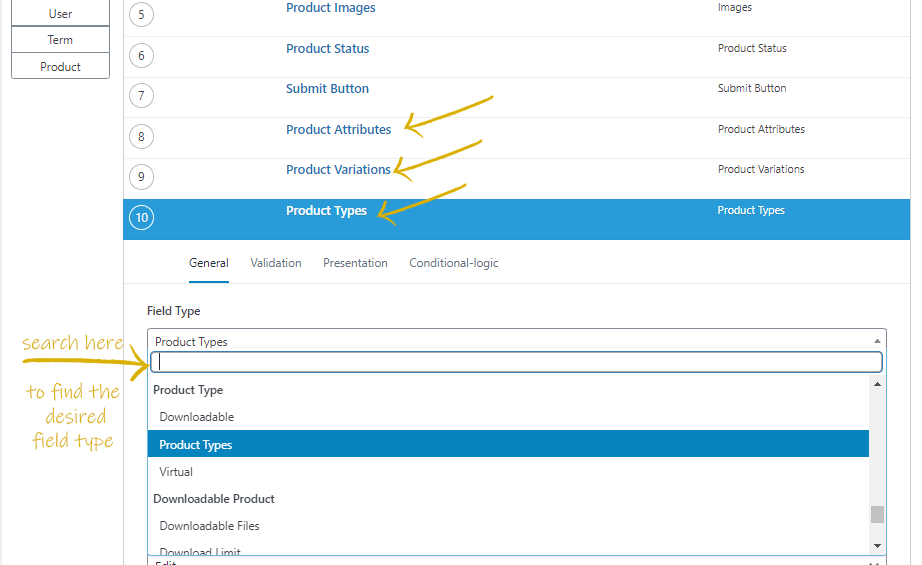
To create a Variable Product there are a few fields we must use. Add three fields to your form: Product Attributes, Product Variations, and Product Type.
To add variations we need the Variations field. The Product Attributes field defines the different variations you need. Additionally, the Variations field is only relevant to variable products so will only be visible to the user when the Variable Product option is selected in the Product Type field.
Most of the other fields can be added or removed independently and have no effect on the Variable Product aspect.
There are certain fields that will be hidden based on the product type. For example, variable products do not use the regular Price field (as you need to add prices to each variation). So when Variable Product is selected as the product type, the Price field would be hidden.
Note that the conditional fields are only rendered in the front end of the web page. In the Elementor preview, all fields will be visible.
Product Type
This is where the user can choose what type of product they would like to add. This selection also controls which other fields are visible and accessible to the user. The fields relevant to variable products will only be visible if the Variable Product option is chosen.
You can configure the selection to be with radio buttons or a dropdown, and you can also define a default choice. The selection will default to Simple Product unless you change it.
This field can also be used to restrict the form to only allow a specific product type. To do this you first define the desired type as the Default Type. Then set the Product Type field to Disabled or Hidden. In this way, the form will show all the relevant fields, but the end user will not be able to change the product type.
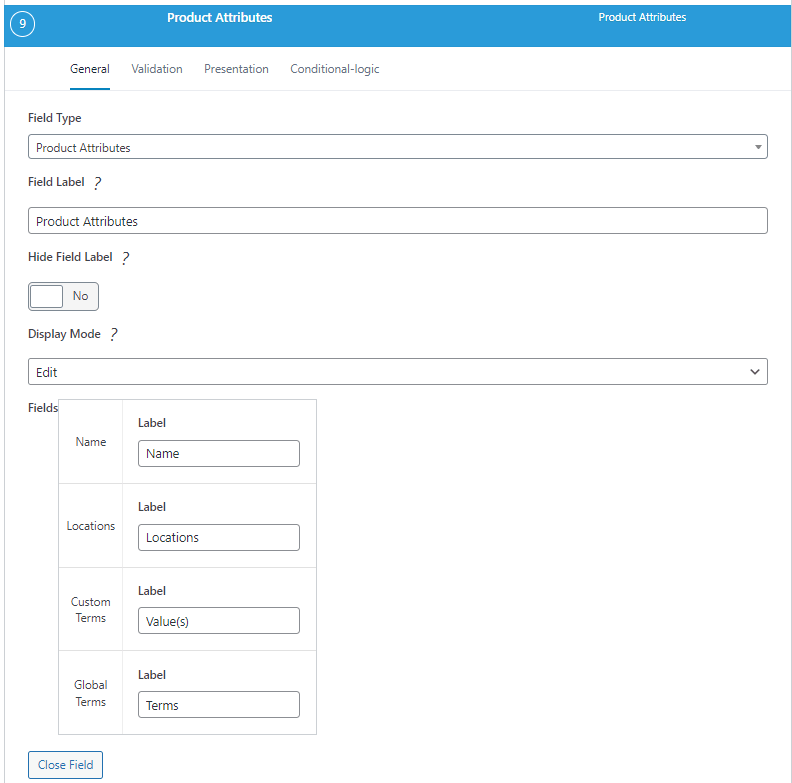
Attributes
Attributes are what allow us to define the different variations. These are minor differences in the product such as color or size. Attributes can be added for any product type for filtering but they are essential for creating variable products.
Attributes have a name and contain values/terms. For example, you might have an attribute called Size whose values/terms are Small, Medium, and Large.
There are four sections in the field: Name, Locations, Custom Terms, and Global terms.
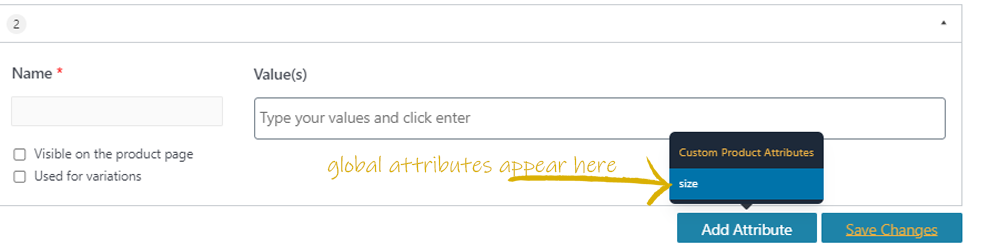
On the front end, the field shows the available options when the user adds a new attribute to a product (number 1 below). Additionally, if you have any global attributes they can be used as well, and the options for them are shown as well (number 2 below). New Global Attributes must be added through the WooCommerce Dashboard.
Note that the “Used for variations” option is only visible if Variable Product is selected in the Product Type field.

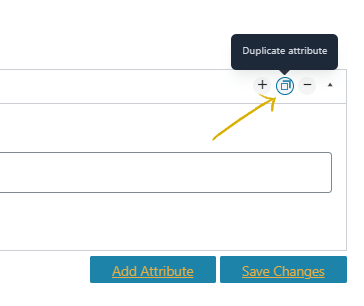
You can also duplicate or delete attributes by clicking the buttons at the top right of the field on the front end.
Adding Custome Product Attributes
The user must add a name and values, by clicking the Add Value button. Multiple values can be added by typing the first one and hitting enter, then typing the next value. This attribute will not be reusable in other products, you will need to add the data again manually.
Global Attributes
If you want attributes to be easily reused across many products, then you must first add them through the WooCommerce plugin before applying them through Frontend Admin. Once you have added global attributes through WooCommerce, the name will already be defined and there will already options for the Terms. Only then, the user can choose from the existing terms by clicking the dropdown. They can also add new terms by clicking the Add New [attribute name] button. Multiple values can be added by typing the first, hitting enter, and then typing another value. These values will be added to the global attribute and can be reused later.
Saving
A front end user must check Use for variations and save changes after adding Attributes before they can add Variations.
Variations
Variations are combinations of two attributes. For example, a product might be available in multiple sizes and colors. In this case, one variation would be red and small. Each of these variations needs to be added individually and can then has its own Description, Images, Price, Sale Price, Sku, Stock Status, and anything else you choose to add.
Adding a new variation can be done by clicking the + at the top of any variation or clicking the Add Variation button.
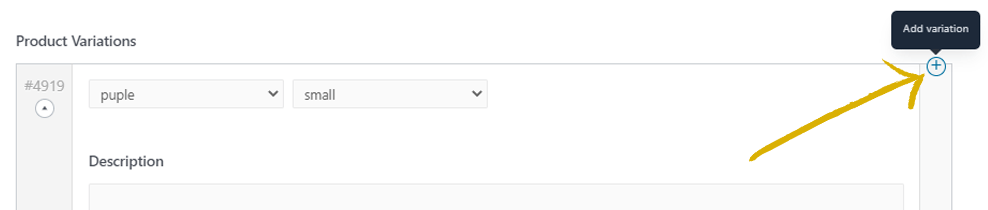
The individual variations can be rearranged and even collapsed by clicking the variation ID and/or arrow on the left.
Once all the variations are added and the form submitted, the product will be created!